Streamlining Notifications: Real-Time Event Logging in Arqut Edge via MQTT
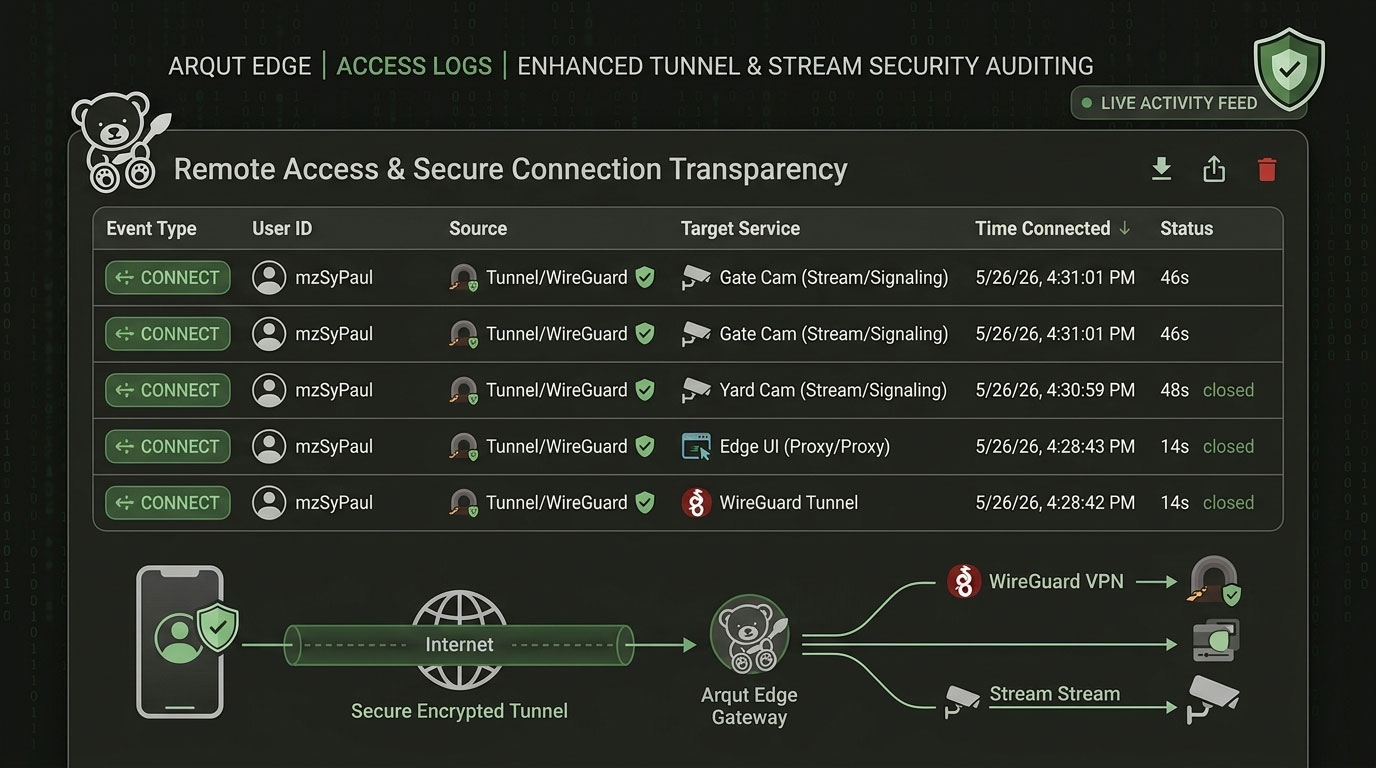
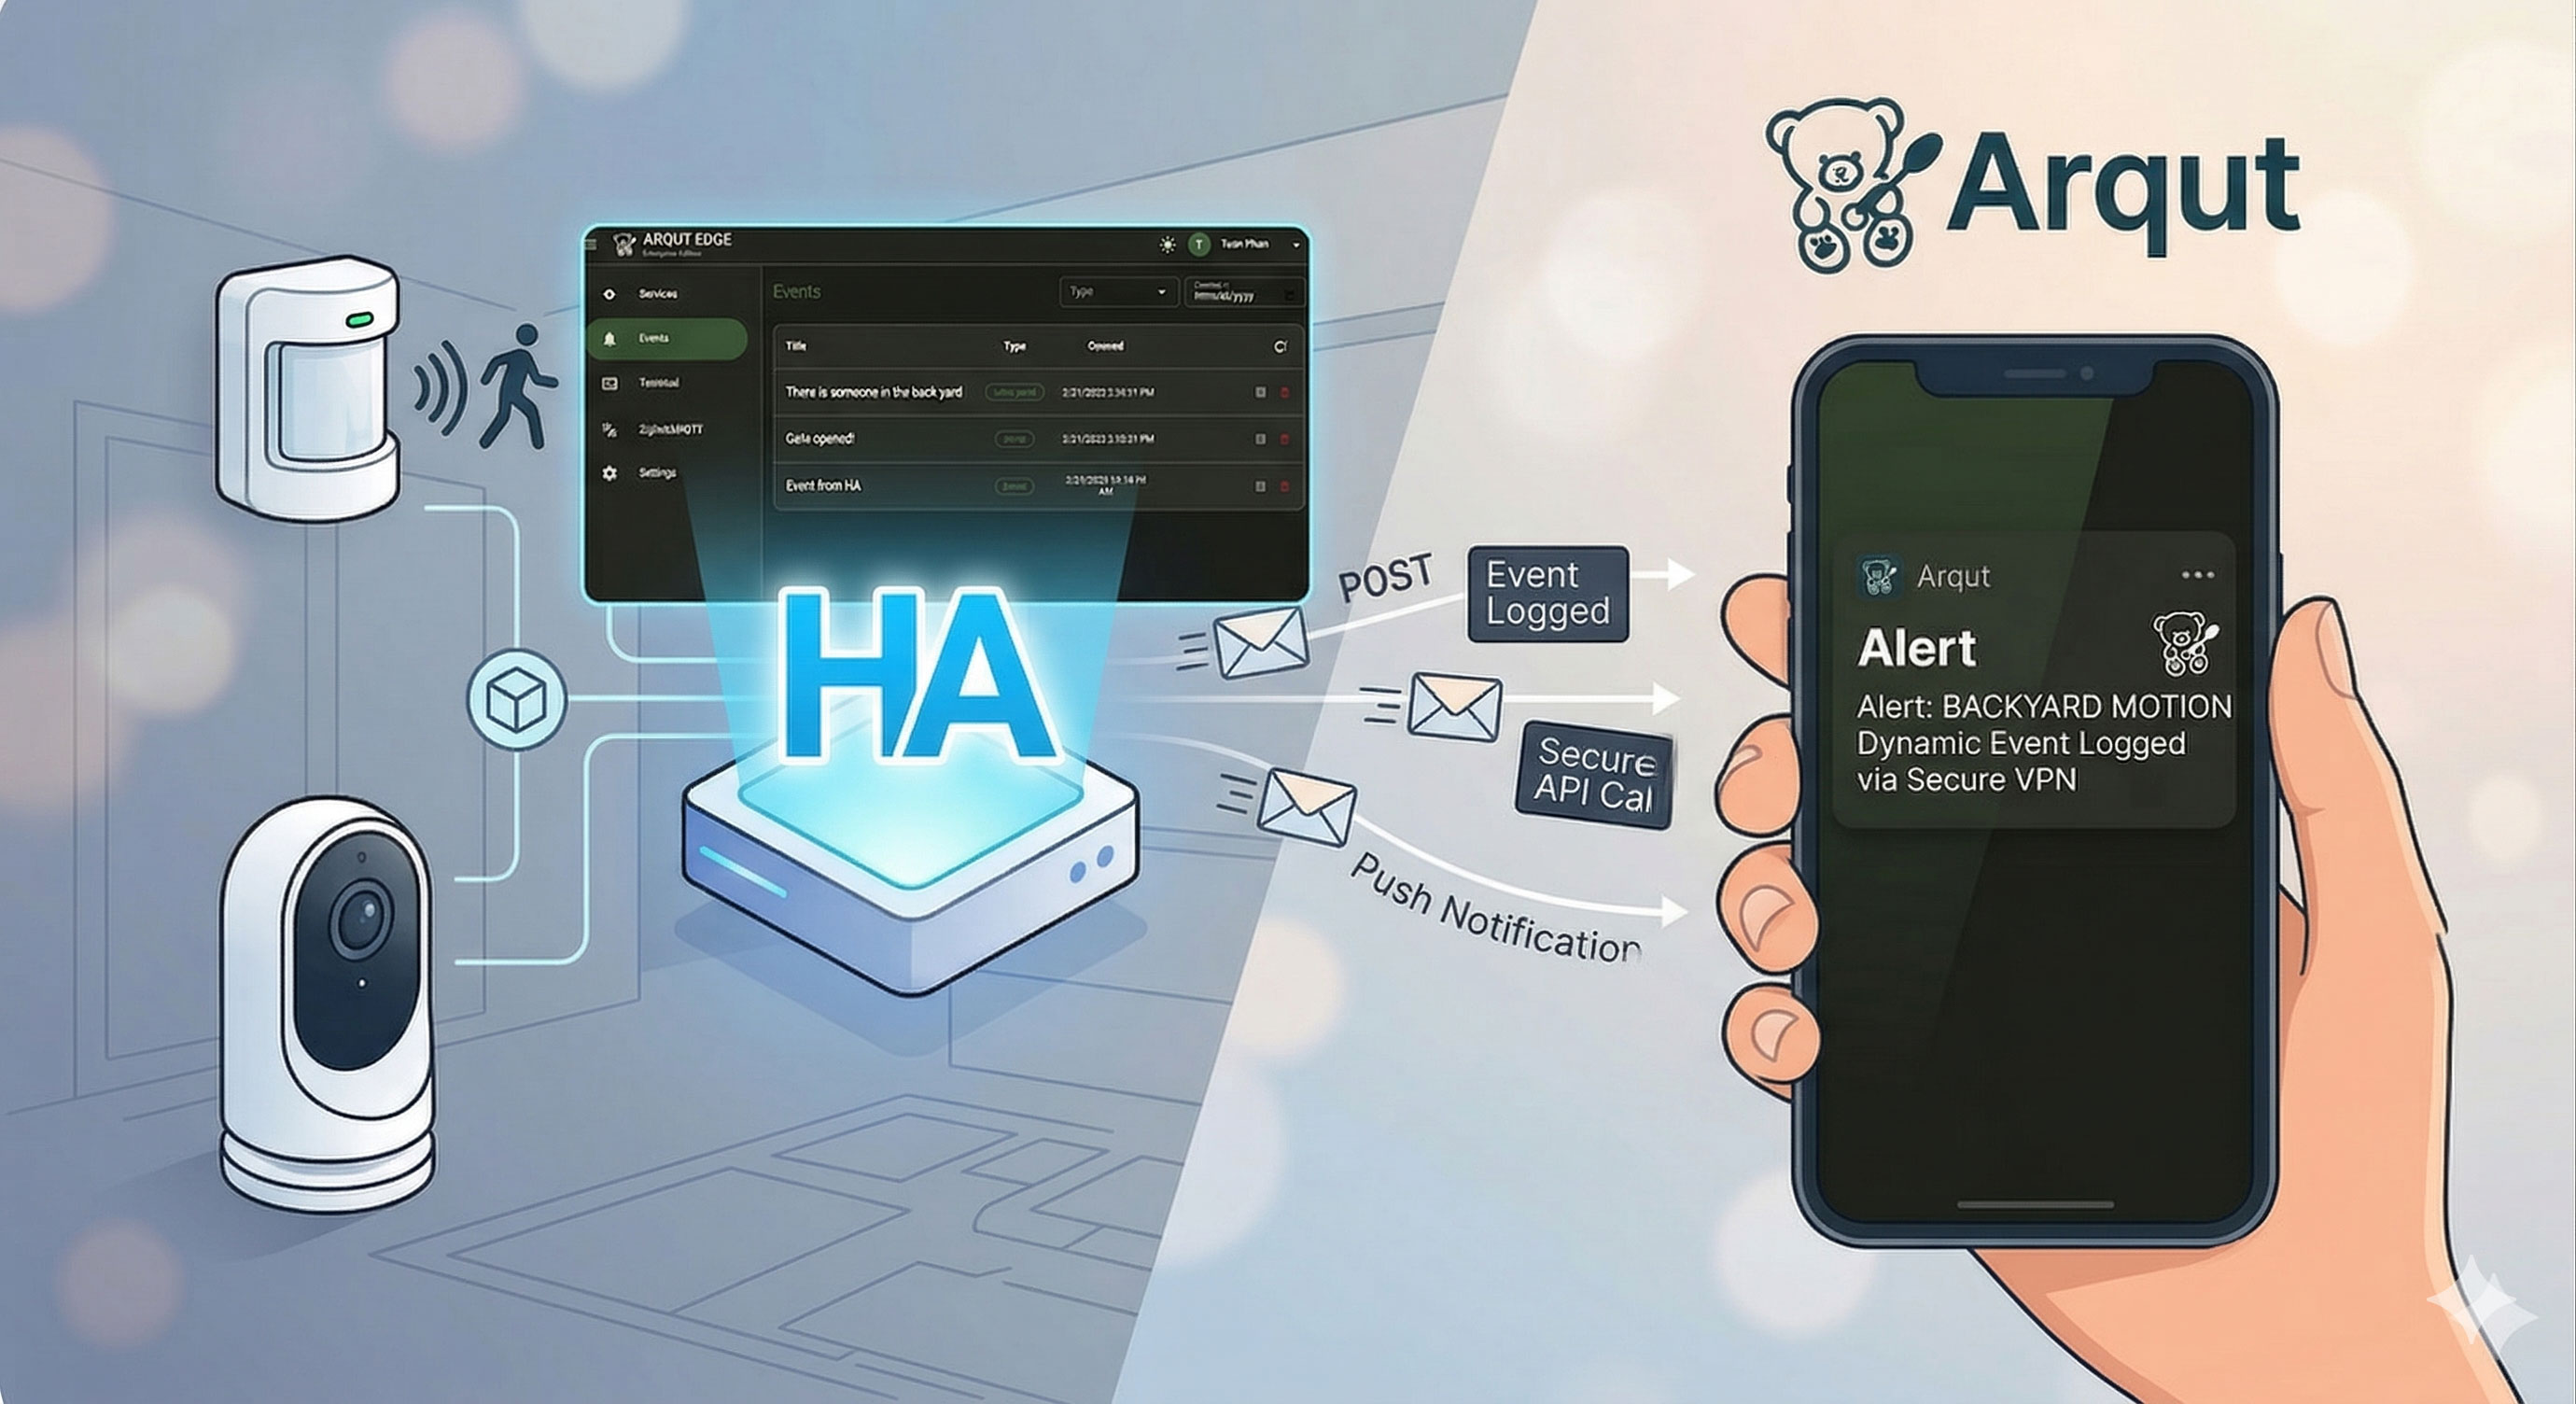
In our previous release of Arqut Edge, we introduced Event Logs, allowing you to feed external system activities and home automation triggers directly into your secure Arqut dashboard and mobile app.
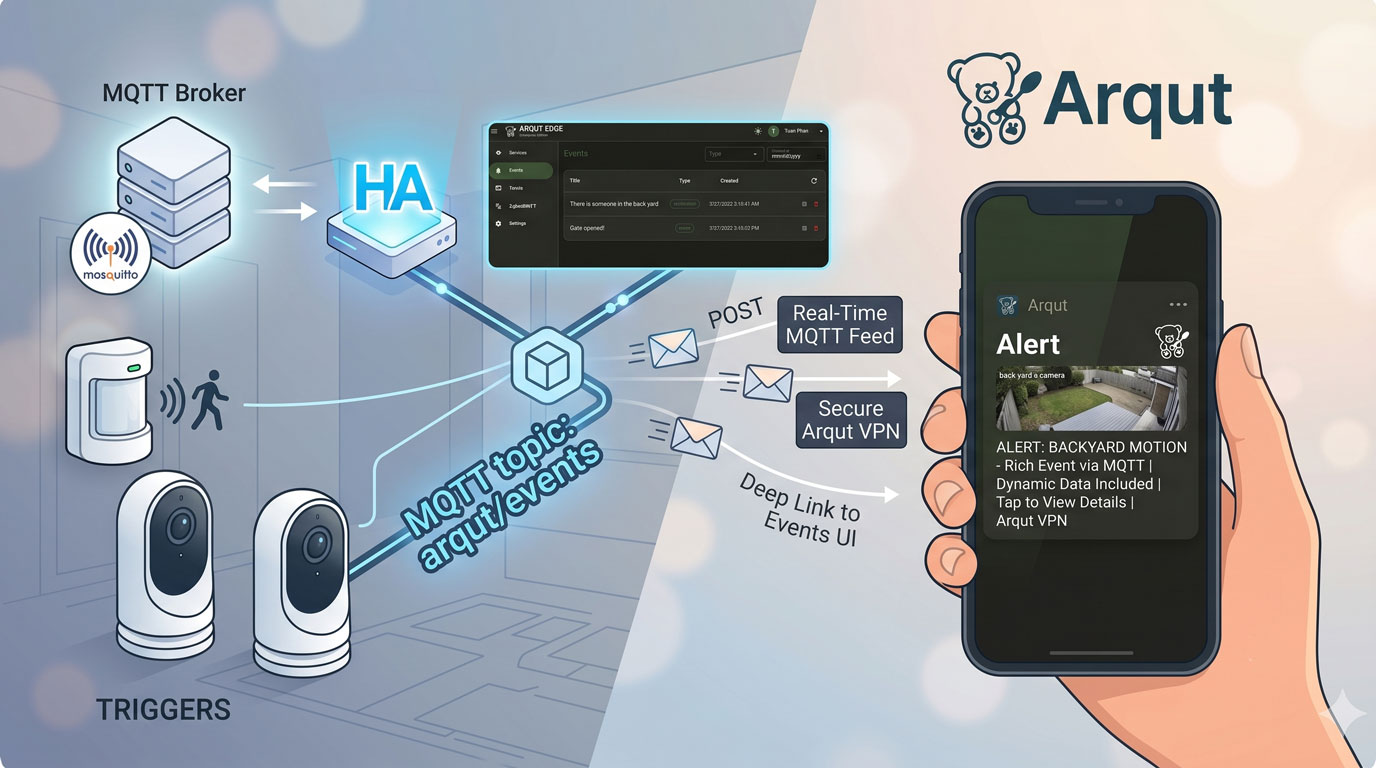
While the traditional REST API and YAML configuration method (which we covered in our previous guide) works beautifully, managing JSON payloads inside Home Assistant’s configuration.yaml file can be tedious. To make your smart home setup even more seamless and dynamic, Arqut Edge now natively supports incoming events via MQTT on the arqut/events channel!
This guide will show you how to connect Home Assistant to Arqut Edge via MQTT, create native automation scripts without touch-editing configuration files, and even deploy them with a single click using a Blueprint.
Step 1: Prepare Your MQTT Broker (If you haven’t already)
If your Home Assistant instance doesn’t have an active MQTT Broker running, you will need to install one. The gold standard for Home Assistant is the Mosquitto Broker App.
- In Home Assistant, navigate to Settings > Add-ons > Add-on Store.
- Search for Mosquitto Broker and click Install.
- Once installed, go to the Configuration tab, set up your settings if needed, and click Start.
- Go to Settings > Devices & Services. Home Assistant should automatically discover the MQTT Integration. Click Configure and submit to finalize the integration.
Step 2: Create a Dedicated MQTT User & Connect Arqut Edge
For security best practices, we will create a dedicated Home Assistant user account for the Arqut Edge connection.
Thanks to Home Assistant’s internal authentication provider, the Mosquitto Broker automatically validates credentials against your local HA users list. We can create a dedicated account directly from the UI without modifying any add-on text files.
- Go to Settings > People > Users (If you don’t see the “Users” menu, ensure Advanced Mode is enabled in your personal Home Assistant Profile page).
- Click Add User in the bottom right corner. Create a user with the following credentials:
- Name:
Arqut Client - Username:
arqut - Password:
arqut(or a secure password of your choice) - Make sure the “Can only log in from the local network” or “Allow login” toggle is enabled.
- Name:
- Now, open your Arqut Edge UI and navigate to Settings > MQTT Client.
- Fill out the connection parameters as follows:
- Broker Host:
tcp://homeassistant.local:1883 - User:
arqut - Pass:
arqut
- Broker Host:
- Click Test Connection. Once you receive a success verification, click Save Configuration.
Arqut Edge is now actively listening to the arqut/events MQTT topic!
Step 3: Create an Event Log Script via HA UI
Instead of editing configuration.yaml, we can create a simple, reusable Script directly inside the Home Assistant UI to handle the event payloads.
- Navigate to Settings > Automations & Scenes > Scripts.
- Click Add Script and select Create New Script.
- Click the three dots in the top-right corner, select Edit in YAML, and paste the following code:
alias: Publish Arqut Event via MQTT
description: Publish Arqut Event via MQTT
sequence:
  - action: mqtt.publish
    metadata: {}
    data:
      evaluate_payload: false
      qos: "1"
      retain: false
      topic: "arqut/events"
      payload: |-
        {
          "title": "Test Event {{ now().strftime('%H:%M') }}",
          "description": "Send test event via MQTT - {{ now().strftime('%Y/%m/%d %H:%M') }}",
          "event_type": "test"
        }
- Save the script. You can run it manually to see a test event instantly pop up on your Arqut Edge UI and your mobile phone!
Step 4: Automating on Motion Detection
With the script ready, routing physical device triggers to your Arqut app becomes incredibly easy. Here is how to map a motion sensor trigger to send an Arqut Event:
- Go to Settings > Automations & Scenes > Automations > Create Automation.
- Set your Trigger:
- Platform: State
- Entity:
binary_sensor.living_room_motion(or your preferred motion sensor) - To:
on
- Set your Action:
- Choose Call Service / Action.
- Select
script.publish_arqut_event_via_mqtt.
- Save your automation. Now, whenever motion is captured, you will securely receive a real-time event log update wherever you are.
Step 5: The One-Click Route — Import Our Official Blueprint
Want an even cleaner implementation without copying any script code? We have built an official Home Assistant Blueprint specifically for this MQTT feature. Blueprints allow you to import pre-configured templates where you simply fill in the blanks using the visual UI.
- Navigate to Arqut HA Add-on Blueprint Repository.
- Click “IMPORT BLUEPRINT TO MY” on section 1. Create Arqut Event via MQTT, select “Open link”, and then click “Preview”.
- Once saved, you can click Create Automation directly from the blueprint page. You will be greeted with an intuitive form where you can map your devices to Arqut Events seamlessly—no code required.
Conclusion
By shifting our event pipeline capabilities to MQTT alongside our existing REST API, Arqut Edge v0.7.x provides a smoother, more responsive, and highly integrated experience for Home Assistant power users. Enjoy zero-config YAML management and tighter smart home monitoring today!